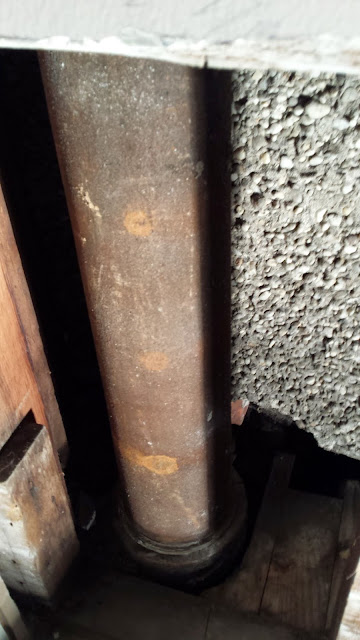
Old Cast iron pipes prior to the 1920s used to be constructed with either the horizontal or vertical casting method. Later, cast iron pipes were centrifugally cast.
Either way, cast iron pipes can usually last a very long time; usually around a 100 years or so. When they eventually fail, they usually crack at places where the iron isn't equally distributed.
One of the cast iron fittings in my 1920s Old house finally failed in 2014, and it needed repairing.
In the past I would shied away from such a daunting repair, but, I had just shelled out around $2000 to plumbers two months prior for a very similar repair in another bathroom, and wasn't keen on repeating it. The material cost of that prior project was around $200, and the labor took about 3 hours and involved opening up a section of the wall about 1.5 feet wide, floor to ceiling, and cutting out old pipe and replacing it with a new cast iron pipe.
I was feeling pretty confident at the time, and felt that I had enough knowledge to attempt this repair. The worse case scenario was that I fail and have to call the plumbers back.
Accessing the Stack Pipe
The cast iron T pipe fitting that cracked, was connected to 3 pipes. This required me to open 3 sections, so that I could access each of the pipes going into this fitting -
- Ceiling - The bottom part of the fitting connected to the stack pipe that eventually led out of the house. This part of the pipe was already exposed in a basement stair well, so I only needed to open the ceiling
- Wall- The top part of the fitting connected to a cast iron sewer vent pipe that terminated in the roof. This required me to open a section of wall in a closet.
- Floor - The horizontal part of the fitting connected into 3 inch brass pipe network from the bathroom. I had remove a toilet in that bathroom so that I could open a small section of floor and expose the cast iron to brass pipe transition.
Looking back, this was a lot more involved and a lot of hard work, and I had clearly underestimated this project.
Cutting the Stack Pipe
I had to first cut out the section of the vertical sewer vent pipe, to easily remove the cracked fitting below it. I did not want this heavy pipe to collapse down after the section was removed. I therefore used a pipe riser clamp to secure the top section fo the pipe to the studs. With the top section secured, I could safely cut out the bottom section.
I debated between using an angle grinder or reciprocating saw and decided to use the saw as it was comparably safer in such a tight space.
At the time of this job, I probably only had about an hours worth of experience using a reciprocating saw, and I was clearly overconfident about the ease of making this cut. I incorrectly assumed that a diamond blade would make short work of cast iron. I burnt through 3 of these blades before giving up and going with a regular heavy duty blade and some oil for lubrication. Looking back, the diamond blades would probably worked had I cut at lower speed.
Replacement
I decided to go with PVC replacement pipe and fittings as they were cheaper and easier to handle solo. I used a solvent cleaner and glue to correctly connect each PVC fitting, and used the sleeves to secure the cast iron and brass pipes to the PVC without leaks. With the walls exposed I also took this opportunity to move to laundry room to the 2nd floor from the basement, but that will be described in another post.
Parts
6 in. Diamond-Grit TORCH SAWZALL Reciprocating Saw Blade (1-Pack)
9 in. Diamond Grit Cast Iron Cutting Reciprocating Saw Blade
6 in. 14 Teeth per in. Medium Metal Cutting SAWZALL Reciprocating Saw Blades (5 Pack)
4 in. x 4 in. PVC DWV Mechanical Flexible Coupling
Extra Thick Reinforced Toilet Wax Ring with Plastic Horn and Zinc-Plated Toilet Bolts
Pipe Fittings
I made multiple trips to HomeDepot and picked up 4inch pipe, 4inch sanitary tee, 4x4x2 tee.


