As far as repairing a water heater here were some of my options -
Replace the anode rod
This is recommended to prevent the interior walls from corroding away. This was unlikely to be the cause of the heating problem.
Replace the heating elements
This can cause heating issues, but was relatively riskier fix -
- Draining the water heater.
- The bottom of the water heater may have debris, that may clog the drain tap.
- Unscrewing the heating elements.
- The threads may have corroded past the point that allows an easy extraction.
Replace both the water heater thermostats
The water heater was still heating. The inconsistent water temps led me to believe that the existing thermostats were no longer functioning accurately. This was also the low effort, low risk, low cost alternative to replacing the entire water heater.
Parts
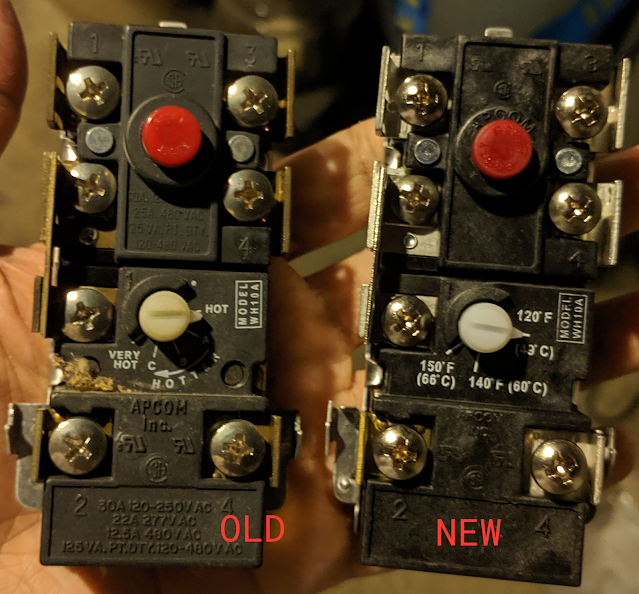
Here are the parts I got. They correspond to the previous thermostats on the Bradford Water Heater.
Apcom WH10-A Bradford White Upper Water Heater ThermostatCamco 07723 WH9 Lower Thermostat - Apcom Style, Black

Warning
Before proceeding with this work, I turned off the circuit breaker servicing this Water Heater, and used a non contact tester to ensure no electric current in the wire going i the Water Heater.
Removing the Protective Panels
Most electric water heaters have 2 heating elements - top and bottom. Both of these heating elements have their own thermostat, that switch the elements on and off. Both the elements and the thermostats are protected by panels.
Each panels is held in place by one screw at the top. At the bottom of each panel is a lip that slides into and behind the outer metal. The panel has some fiberglass material on its rear side, which ensure that the thermostat inside is not affected by fluctuations in the temps outside the water heater.


Removing the Protective Plastic Cover


Removing the Old Thermostats


Installing the New Thermostats
- Set the temp
- Replace the protective plastic
- Replace the protective panels